Changing to DSS Audio Format on an Olympus DS-7000 & DS-5000
There are many reasons why you might need to change to the DSS audio format setting on your Olympus DS-7000 digital dictation recorder. The default setting for both the DS-5000 and the DS-7000 is .ds2, which is the most recent version of Olympus’ proprietary audio format. However both the DS-5000 and DS-7000 have the flexibility to record in the DSS audio format (.dss), which is an older version of Olympus’ proprietary audio format.
Users may sometimes find .dss audio format more compatible with a wider variety of software. Some older versions of Olympus DSS Player Pro transcription software only recognise .dss recording format. Some non-proprietary transcription software, such as NCH’s Express Scribe Professional, are sometimes unable to read certain .ds2 files. This may be to do with the brand of Dictaphone on which the files are created, which may create particular sorts of .ds2 files according to manufacturer specifications. Even some converter programs, such as Switch, are unable to convert some .ds2 files. This can create lots of problems for transcriptionists and slow down the daily workflow.
If the audio file is created in a different format from the very start, then this problem can be eliminated. It is really easy to quickly change the audio format on your Olympus DS-7000 so that it records in .dss.
Following are step-by-step instructions on how to change the recording format on your DS-7000 through your ODMS dictation software. (Please note that the process is similar for the DS-5000, but instead, is done through DSS Player Pro dictation software, which came with the DS-5000.)
You will most likely have already installed the ODMS dictation software on your computer.
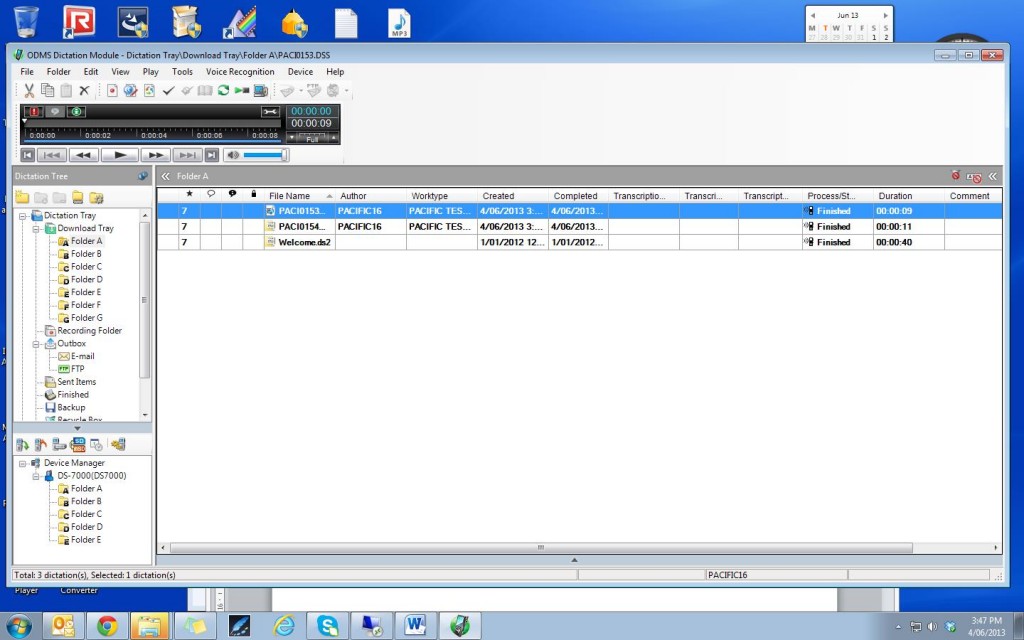
1. Make sure the device is turned on and sitting either in its cradle or plugged directly into your computer via a USB connection. Open the dictation software. Your software will look something like this.
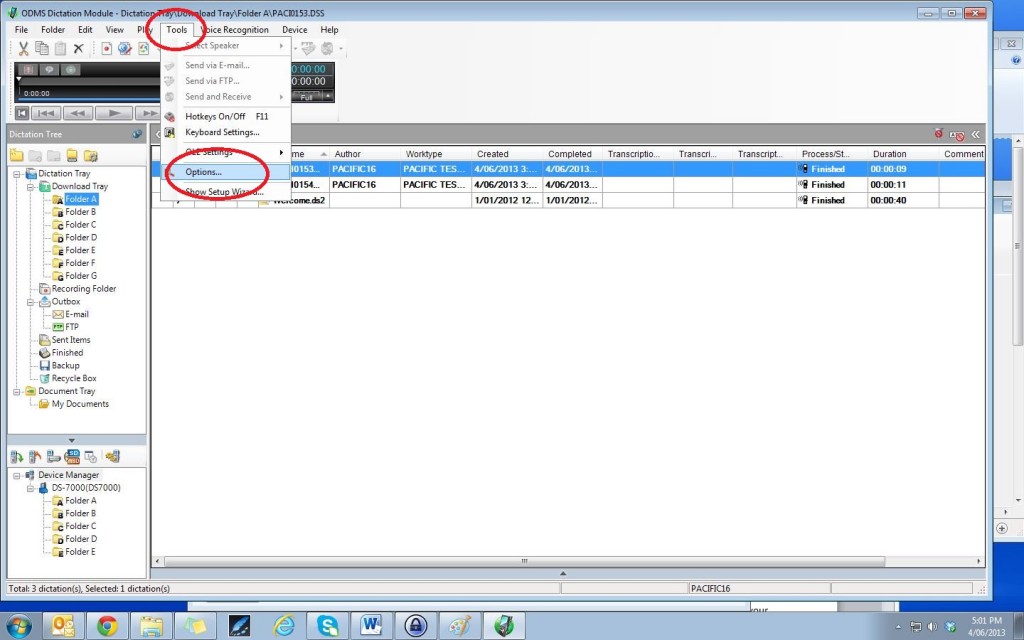
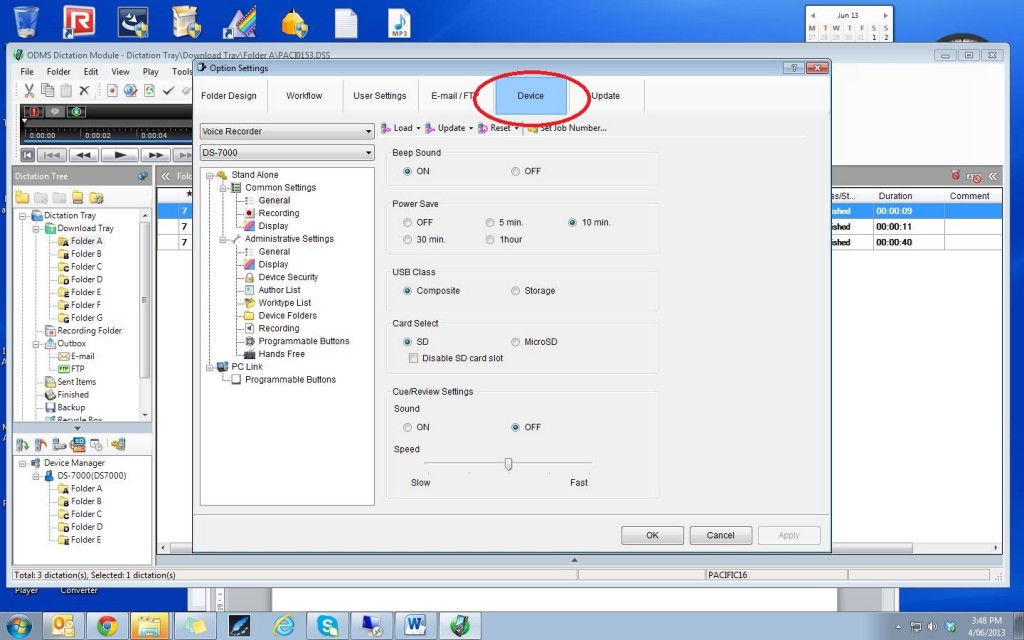
2. Click on the Tools tab and select Options. Click on Device tab at the top middle of the window.
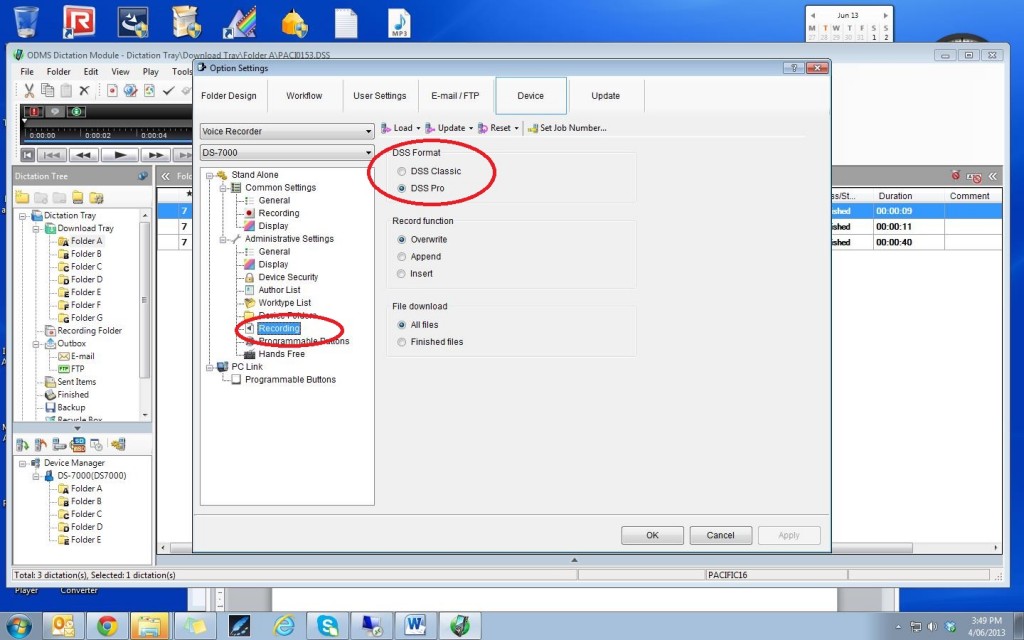
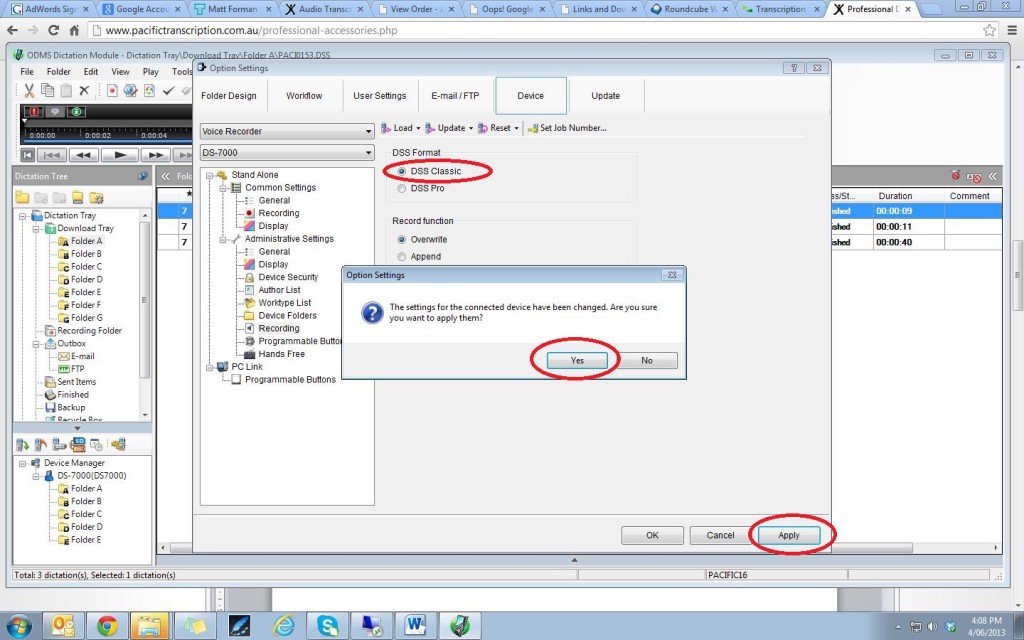
3. Scroll down to the Administrative Settings folder and click on the Recording button, which is the 7th option down. You will now see DSS Audio Format options: DSS Classic (.dss) and DSS Pro (.ds2). Click DSS Classic.
4. Now click the Apply button, located at the bottom of the window. You will be asked if you want to apply the setting changes. Click Yes. Click Yes again, and then Okay, at the bottom of the window.
Now you should be all set to record in the DSS audio format! If you still need help, you can speak to the professional transcription company Pacific Transcription by calling on 1300 662 173 or getting in touch online!


